前言
最早接触 Hexo 的时候,是通过 Github Pages 进行搭建的,后来遂琢磨着如何才能将博客部署到属于自己 VPS 上去。早前曾尝试过一次,磕磕绊绊,最终卡在了 VPS 部署 Git Hook 的步骤上。
经过一段时间的积累,对 Linux 和相关命令行操作有了粗浅的认识,最近再次尝试 VPS 部署 Hexo 博客,操作起来流畅了很多,也很快搭建成功。打算把这个过程记录下来。
下文是基于 Ubuntu 进行搭建的,CentOS 搭建过程基本一致,只需将安装程序的 apt-get 命令换成 yum 命令即可。文中 $ 后均为执行的命令,# 后均为注释,<IP地址> 均为 VPS 的 IP 地址
本地配置
-
安装 Git
-
安装 Node.js
-
运行
Git Bash或CMD:$ git config --global user.email "<邮箱>" $ git config --global user.name "<用户名>" $ ssh-keygen -t rsa -b 4096 -C "<邮箱>" #默认全部设置最终生成 ssh 密钥 id_rsa.pub -
在
%userprofile%/.ssh/文件夹下(也就是生成公钥的文件夹)创建config文件,输入如下内容:# Hexo Blog Host <IP地址> HostName <IP地址> User git Port <SSH端口> #默认为 22 IdentityFile ~/.ssh/id_rsa
p.s. Hexo 本地部署相关教程可参考 Hello Hexo,Git 相关教程可参考 Git 简明教程
服务端配置
准备工作
$ apt-get update           #更新 apt-get 源
$ apt-get upgrade -y       #升级已有软件
$ apt-get install libpcre3 libpcre3-dev openssl libssl-dev g++ build-essential git -y    #安装各种程序和依赖
$ adduser git              #密码自己设置,其他可选空
$ chmod 740 /etc/sudoers   #变更用户权限设置文件权限
$ vi /etc/sudoers          #编辑用户权限设置文件
在 /etc/sudoers 文件的用户权限部分添加 git 用户权限:
### Allow root to run any commands anywhere
root    ALL=(ALL)     ALL             #原有部分
git     ALL=(ALL)     ALL             #添加部分
保存并退出编辑,并还原用户权限设置文件权限:
$ chmod 440 /etc/sudoers
Nginx
安装
$ useradd www -s /sbin/nologin -M            #添加用户 www 并禁止 SSH 登录
$ mkdir -p /data/software/                   #建立一个放各种软件的目录
$ cd /data/software/                         #进入目录
$ wget http://nginx.org/download/nginx-1.10.1.tar.gz    #下载 Nginx 软件包
$ tar zxvf nginx-1.10.1.tar.gz                          #解压
$ cd nginx-1.10.1                                       #进入目录
$ ./configure --user=www --group=www --prefix=/usr/local/nginx --with-http_stub_status_module --with-http_ssl_module   #配置编译
$ make                                                  #编译
$ make install                                          #安装
检查 Nginx 是否安装成功:
$ ll /usr/local/nginx/
total 24
drwxr-xr-x  2 root root 4096 Dec  5 14:48 conf/       #显示结果
drwxr-xr-x  2 root root 4096 Dec  5 14:48 html/       #显示结果
drwxr-xr-x  2 root root 4096 Dec  5 14:48 logs/       #显示结果
drwxr-xr-x  2 root root 4096 Dec  5 14:48 sbin/       #显示结果
Nginx 安装到此完成
测试
仅仅安装是远远不够的,还需要测试一下是否配置正常并启动 Nginx:
$ /usr/local/nginx/sbin/nginx -t         #启动前检查配置文件语法
nginx: the configuration file /usr/local/nginx/conf/nginx.conf syntax is ok    #显示结果
nginx: configuration file /usr/local/nginx/conf/nginx.conf test is successful  #显示结果

$ /usr/local/nginx/sbin/nginx            #启动 Nginx

$ lsof -i :80                            #查看 nginx 服务对应的端口是否成功启动
COMMAND   PID USER   FD   TYPE DEVICE SIZE/OFF NODE NAME
nginx   34317 root    6u  IPv4  39180      0t0  TCP *:http (LISTEN)     #显示结果
nginx   34318  www    6u  IPv4  39180      0t0  TCP *:http (LISTEN)     #显示结果

$ netstat -lntup | grep 80                #查看 80 端口的设置
tcp     0     0 0.0.0.0:80     0.0.0.0:*     LISTEN     34317/nginx     #显示结果
使用 Web 方式访问本机的外网 IP 时显示如下图:
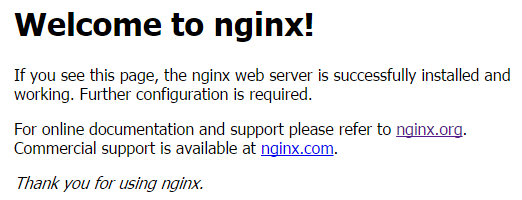
如上图正常显示,则表示 Nginx 已成功安装并能正常使用
配置
配置文件说明
Nginx 的主配置文件为 /usr/local/nginx/conf/nginx.conf,其配置详细含义如下:
worker_processes  1;                              #worker进程的数量
events {
    worker_connections  1024;                     #每个worker进程支持的最大连接数
}

http {
    include       mime.types;                     #nginx支持的媒体类型库文件
    default_type  application/octet-stream;       #默认的媒体类型
    sendfile        on;                           #开启高效传输模式
    keepalive_timeout  65;                        #连接超时

    server {                                      #第一个server区块,
                                                   表示一个独立的虚拟主机站点
        listen       80;                          #提供服务的端口,默认80
        server_name  localhost;                   #提供服务的域名主机名
        location / {
            root   html;                          #站点的根目录
            index  index.html index.htm;          #默认的首页文件,多个用空格分开
        }
        error_page   500 502 503 504  /50x.html;  #出现对应的http状态码时,使用50x.html回应客户
        location = /50x.html {                    #location区块,访问50x.html
            root   html;                          #指定对应的站点目录
        }
    }
}
规范配置文件
一般来说,为了便于各虚拟主机的管理,我们将所有虚拟主机的自配置文件会统一放入 vhost 目录中,并在 Nginx 的主配置文件中添加配置 include vhost/*.conf; 来使 vhost 目录中的虚拟主机的自配置文件加载进来。公共的配置项写在主配置文件中,各虚拟主机的自配置文件则用于差异化,比如规定虚拟主机配置的网站域名或功能取名等等。
先编辑主配置文件 /usr/local/nginx/conf/nginx.conf :
$ echo "" > /usr/local/nginx/conf/nginx.conf      #清空配置文件
$ vi /usr/local/nginx/conf/nginx.conf             #编辑主配置文件
内容如下:
worker_processes  1;
events {
    worker_connections  1024;
}
http {
    include       mime.types;
    default_type  application/octet-stream;
    sendfile        on;
    keepalive_timeout  65;

    log_format  main  '$remote_addr - $remote_user [$time_local] "$request" '
                      '$status $body_bytes_sent "$http_referer" '
                      '"$http_user_agent" "$http_x_forwarded_for"';

    include vhost/*.conf;
}
如下提供一个 host 为 VPS <IP地址> 的虚拟主机的配置文件 /usr/local/nginx/conf/vhost/<IP>.conf 的规范化模板,仅供参考:
$ mkdir vhost                                     #新建 vhost 目录
$ vi /usr/local/nginx/conf/vhost/<IP地址>.conf    #编辑子配置文件
内容如下:
server {
        listen       80;
        server_name  <IP地址>;
        root /data/web/<IP地址>/;
        index index.html index.htm;
        access_log  logs/access.log main;
        error_page   404  /404.html;
        error_page   500 502 503 504  /50x.html;
        location = /50x.html {
        root   html;
        }
}
$ /usr/local/nginx/sbin/nginx -t         #检查配置文件语法,报错说明配置文件语法有误
nginx: the configuration file /usr/local/nginx/conf/nginx.conf syntax is ok    #显示结果
nginx: configuration file /usr/local/nginx/conf/nginx.conf test is successful  #显示结果

$ /usr/local/nginx/sbin/nginx -s reload      #重启 Nginx,使配置文件生效
$ mkdir /data/web && cd /data/web            #新建 web 目录用于 Web 访问
$ mkdir <IP地址> && cd <IP地址>               #新建虚拟主机对应的 Web 目录
$ chown git:git -R <IP地址>                  #授权给 git 该目录权限
设置 Hexo 对应的 Git 仓库
$ su git                           #切换到 git 用户
$ cd ~                             #进入用户根目录
$ mkdir .ssh && cd .ssh            #新建并进入 .ssh 目录
$ touch authorized_keys            #新建 authorized_keys 文件用于识别 ssh 访问者身份
$ vi authorized_keys               #复制粘贴 Windows 的 %userprofile%/.ssh/id_rsa.pub 文件内容
$ cd ~                             #进入用户根目录
$ mkdir hexo.git && cd hexo.git    #新建并进入 hexo.git 目录
$ git init --bare                  #初始化仓库
在 Windows 的 Git Bash 或 CMD 中输入 ssh git@<IP地址>, 显示如下则表示设置成功:
Are you sure you want to continue connecting (yes/no)? yes
Warning: Permanently added '45.76.211.104' (ECDSA) to the list of known hosts.
Welcome to Ubuntu 14.04.5 LTS (GNU/Linux 3.13.0-100-generic x86_64)

 * Documentation:  https://help.ubuntu.com/
New release '16.04.1 LTS' available.
Run 'do-release-upgrade' to upgrade to it.


The programs included with the Ubuntu system are free software;
the exact distribution terms for each program are described in the
individual files in /usr/share/doc/*/copyright.

Ubuntu comes with ABSOLUTELY NO WARRANTY, to the extent permitted by
applicable law.

git@vultr:~$                       #这里表示 SSH 成功登录 VPS
$ su git                          #切换到 git 用户
$ cd /home/git/hexo.git/hooks     #进入仓库的钩子目录
$ vi post-receive                 #编辑钩子设置转发,实现仓库内容同步到 Web 目录
编辑内容如下:
#!/bin/bash
GIT_REPO=/home/git/hexo.git
TMP_GIT_CLONE=/tmp/hexo
PUBLIC_WWW=/data/web/<IP地址>
rm -rf ${TMP_GIT_CLONE}
git clone $GIT_REPO $TMP_GIT_CLONE
rm -rf ${PUBLIC_WWW}/*
cp -rf ${TMP_GIT_CLONE}/* ${PUBLIC_WWW}
授权 post-receive 文件可执行权限:
$ chmod +x post-receive
Hexo 发布到 VPS
修改 hexo 配置文件:
deploy:
  type: git
  repo: git@<IP地址>:hexo.git
  branch: master
发布时进入 Windows 中 hexo 目录,CMD 或 Git Bash 运行发布命令即可:
$ hexo d